lecture topic - May 16 2007 - Preparing final hand-in
The topic was examining images from the past to develop a plan to present well.
We talked about:
Ensuring that the images presented in the final render set developed a theme about the building. The goal was to try to focus on presenting in images some form of narrative that enhanced your reader/viewer's knowledge of the building or of the process of modelling or of the process of rendering... Examples that were presented of acceptable foci for a themed page were:
- comparison of the Light Studio and the Mental Ray renderers (e.g. time vs quality)
- an analysis of the way(s) in which daylight reaches the interior through sections and other views
- an analysis of the architect's writing about his/her building is revealed in the form /light interplay
- an examination of the role of light in the progression one makes through the building from outside to in or from gallery to gallery ...
- representation / revealing of the qualities of light in the major spaces in early morning / late afternoon - summer / winter - night / day - sun / overcast conditions
- interrogation of the design principles - formal / rhythmic / organic / asymmetric - affect the flow of light
Assignment One - Part B
- Minimum
The fifteen rendered images should be visible on the website in thumbnail form. Appropriate background image(s) to represent the view out from the building, or appropriate "textures" applied to art works in an art gallery or similar contextual information will be required.The web page should also contain appropriate text documenting: your name, the name of the architect, the course, the date and the name of the modeling and rendering packages used to produce each image. - Below Average
All above, plus: at least ten renderings using Autodesk Viz to simulate realistic lighting conditions in the space(s) in a minimum of two different ways using Global Illumination and not (7 of one approach: 3 of the alternate is the maximum deviation from the desired 5:5 split in pictures). - Acceptable
All above, plus: documentation of the image differences and the settings used and time taken to render between the two Viz renderings approaches. - Average
All above, plus: all fifteen renderings using AutoDesk Viz/Lightscape AND Rayfront/Radiance to simulate realistic lighting conditions in the space(s) NOTE: with the arrival of the LightStudio plugin, it is important to recognise that the split here is between the (Mental Ray) PHOTON MAPPING rendering approach and the (RADIANCE) BACKWARDS RAY TRACE approach. Thus the different renders are Global Illumination within the Mental Ray Renderer in Viz and Radiance with the Lightstudio renderer in Viz. - Good
All above, plus: use of AutoDesk Viz/Lightscape AND Rayfront/Radiance/LightStudio to simulate realistic lighting conditions in the space(s) with some additional images at night (say 6 daylight rendered with one program and 9 daylight with the other, plus 3-6 with artificial lighting); and all thumbnails link to larger minimum 1280x1024 images on your personal web site. - Above Average
All above, plus: association of the idea, concept or theme being communicated with a critical idea, concept or theme: e.g. analysis of relationship between this building and others by the same architect or others from same era; or analysis of natural lighting via sky and sunlighting; or examination of systems of circulation through buildings and demonstration of which system this building belongs to .... - Very Good
All above, plus: use of Autodesk Viz/Lightscape and Rayfront/Lightstudio for four of the views showing how the natural lighting models compare between the two rendering programs. - Excellent
All above, plus: ... you tell me (the possibilities are endless)?

hdrview is available on the same R:\esources directory if one wants to view the hdr image. There are plenty available online - just check FLICKR.
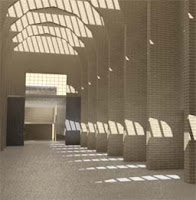
Also we examined the role of procedural materials in making more interesting images than can be achieved with materials which are merely pictures pasted onto surfaces... This work from Irena a couple of years ago is an illustration of a procedural texture in Radiance - the underlying render engine to Light Studio:

And finally, a couple of words of caution:
- bringing files into Viz successfully is only part I of the render process. Make sure also that you can render in Light Studio and in Mental Ray. If your object names are very long because of the manner in which you have brought the model into Viz, then the Light Studio renderer will not work. You must fix this somehow by altering the layer / object names in the export process, or by importing the file into Deep Exploration and then re-exporting in the simpler form...
- As noted at the beginning of the year, Light Studio only work in Viz - if you have exported to Max for mental ray, then be aware that you will be competing for a much smaller number of licenses than with Viz come crunch render time AND you will still have to export that model and read it back into Viz to use Light Studio
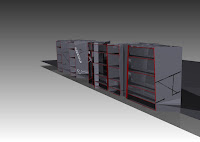
- There is a major flaw in the Viz 'section' tool that stops it from producing sections that are orthogonal to the building - because sections are created by setting 'cutting planes' in Viz/Max camera definitions. The work around is that one can create the files in Viz and with the mental ray renderer run the 'render to texture' option. Then save the file out as a 3ds format - with named camera views. THEN within Deep Exploration (DE) one can set up the section plane (
+X) rotated and placed where it shows off the interior best and from within DE... Witness this simple B&W model rendered with a cutting plane:

Footnote: link to hdr render and good caustics for water in same tutorial when compiling this blog.
No comments:
Post a Comment